Getting connected with My Disney Experience
- Create a Disney account. Create a free Disney account first: it’s the login for My Disney Experience, Disney+, and other Disney services.
- Link your reservation. Link your reservation at StartYourDisneyExperience.com. Connect your travel party through Friends & Family.
- App vs. website. Download the My Disney Experience app after you’ve set everything up online. The website has more features for planning; the app is for on-the-go access at the parks.
- Set up early. Set up as soon as you book. Dining reservations open 60 days out for resort guests, and Lightning Lane selections open 7 days out.
- In-park features. At the parks, use the app for real-time wait times, mobile food ordering, virtual queues, and interactive maps.
- Resort guest extras. Resort guests get extra features: mobile check-in and check-out, Digital Room Key, bus times, and room charging.
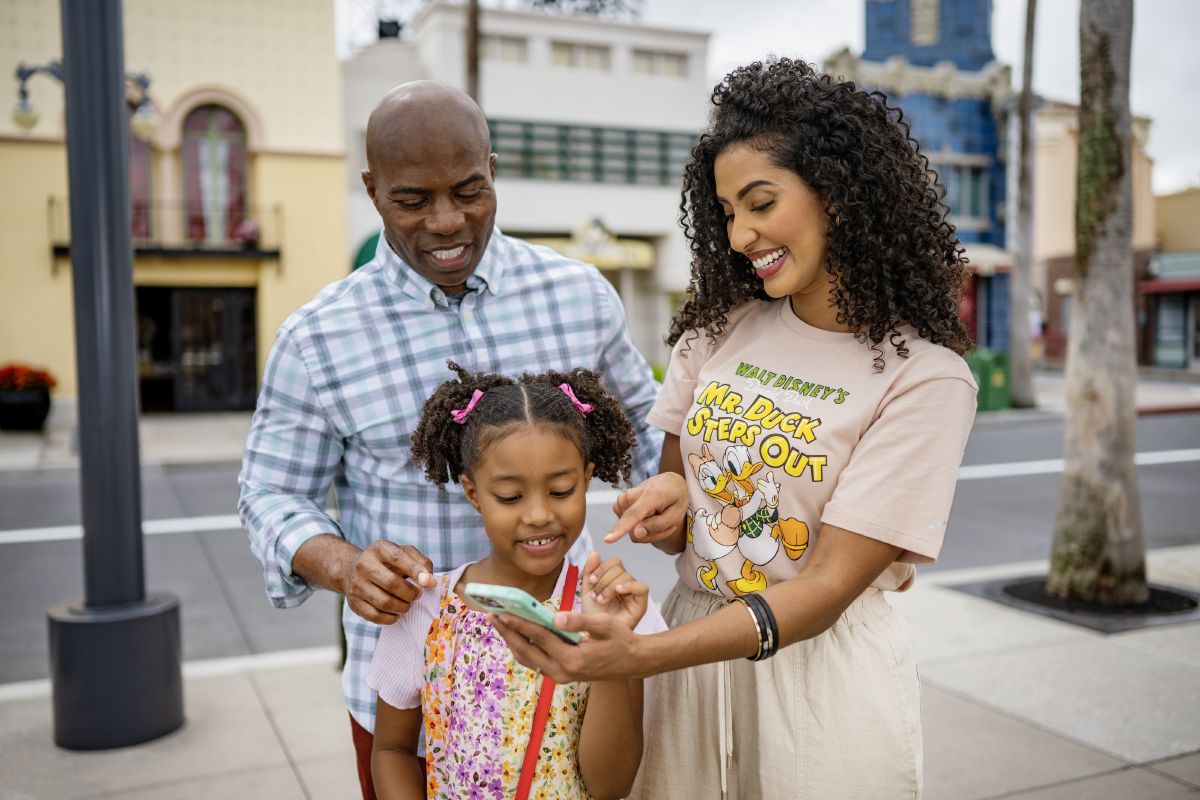
My Disney Experience is the free Disney World app that runs your whole vacation. You’ll use it to manage tickets, make dining reservations, and buy Lightning Lane passes. It also handles Enchanting Extras, mobile food orders, and wait times.
Getting connected
Getting connected takes three steps. First, create a Disney account. Then link your travel party and download the mobile app. Start from the website, which has more features and makes it easier to manage your group’s settings. The app is what you use on the go at the parks.
Create your Disney account
Your Disney account is what ties your whole trip together. Your tickets, hotel reservation, dining plans, and Lightning Lane passes all live under one login. Without it, none of the planning tools work.
If you already sign in to Disney+, shopDisney, Disney Store, or any other Disney service, you have a Disney account. Use that same email and password; no need to create anything new. If you don’t have one yet, go to StartYourDisneyExperience.com and create a free account. Every adult with a smartphone should have their own. You must be 18 years or older to create an account.
Link your reservation
Once your account exists, link your reservation. Disney Resort hotel reservations, tickets, and dining all connect to your account so everything shows up in one place. Go to StartYourDisneyExperience.com and enter your confirmation number. It’s easiest if each lead guest on a reservation starts this process, then invites the other adults in the room. If you booked through a travel advisor, your reservations may already show up. Check “My Plans” to confirm.
Do this from the website rather than the app. The website has more features and lets you manage account settings and sharing preferences. That matters later when you want every adult in your group to be able to make plans for everyone. If you run into any issues, check our troubleshooting tips below.
Do I need a separate account for My Disney Experience?
Connect your Friends & Family
At Walt Disney World Resort, one person should not have to handle everything. You’ll want any adult in your group to be able to book a dinner, grab a Lightning Lane pass, or check the schedule without passing a phone around. That’s what Friends & Family does. It links your travel party’s accounts so everyone can see and manage the group’s plans.
Every adult needs their own Disney account first. Once everyone has one, go to the Friends & Family page on the website and invite each adult by email. They accept from their own account, and you’re linked. Any adult can then make or change reservations for the whole group.
If your party has separate reservation numbers (say, two families in different rooms), this step matters even more. Each person in one room should connect with everyone in the other rooms. That way the whole group can book rides and meals together or split into smaller groups. Each adult should check their sharing settings. Allow all connections to view and change plans, view Disney PhotoPass photos, and make plans for any managed guests.
Children don’t need their own accounts. A parent can add kids to their profile and manage their tickets, Lightning Lane passes, and dining reservations. Link all the adults first, then add children to whichever parent’s account makes sense for your family.
For multigenerational groups
What can connected Friends & Family members see and do?

Download the My Disney Experience app
The website is where you set things up. The app is where you use them. At the parks, the app is how you check wait times, order food, find rides on a map, and manage your Lightning Lane reservations.
Download it free from the Apple App Store or Google Play. Sign in with the same Disney account you set up online. Check that your device is compatible before your trip.
Once you’re logged in, make sure everything carried over from the website. Check “Future Plans” to confirm your reservation shows up. Go to “Profile” then “Family & Friends List” to confirm your travel party appears.
The app and the Walt Disney World website share the same account. Anything you do on one shows up on the other. The website has more features for planning at home. It makes it easier to compare dining options and figure out how many days you need on a larger screen. Use the app at the parks for real-time info and on-the-go access.
The website is your planning tool. The app is your in-park companion. Before your trip, browse Lightning Lane options and make dining plans from the website. At the parks, pull up wait times for every ride. Order lunch so it’s ready when you arrive. Check when the next bus leaves your Disney Resort hotel. The app is also the easiest way to find all of Disney’s transit options.
For first-time visitors
What to do before your trip
The app unlocks several features weeks or months before you arrive. Here’s a timeline of what to set up and when:
- As soon as you book. Create your Disney account and link your reservation at StartYourDisneyExperience.com. Connect your travel party through Friends & Family. Set up Disney MagicMobile Service on your phone (see below). Order a MagicBand+ through the app if you want one.
- 60 days before arrival. Make dining reservations for table-service restaurants. All guests can book 60 days out. Resort guests get an advantage. They can book their entire stay (up to 10 nights) at once. Off-site guests book one day at a time as each new window opens. Popular spots like Be Our Guest and ‘Ohana fill up fast. Check the crowd calendar so you know which dates to prioritize. Start browsing Walt Disney World dining menus in the app right away.
- 7 days before arrival (resort guests). Buy and select your first three Lightning Lane Multi Pass attractions. Off-site guests can do this 3 days before. Our Lightning Lane overview explains which pass works best for your family.
- The night before each park day. Double-check your park reservation, dining times, and Lightning Lane selections. Make sure everyone in your group shows up and has the correct tickets.
Set up Disney MagicMobile
Disney MagicMobile Service turns your phone into a contactless park ticket and room key. Open the app, tap the menu, and select “Disney MagicMobile.” Choose a pass design and follow the steps for your device.
- Tap “Add to Apple Wallet.”
- Express Mode turns on by default. Hold your phone near the reader at a park gate or hotel room door and it works without unlocking the screen.
- Tap “Add to Google Wallet.”
- Unlock your device, then hold it near the reader at a park gate or hotel room door.
You can set up MagicMobile passes for everyone in your travel party from a single phone. This is a big help for young kids who do not carry their own device.
What to use it for at the parks
Once you’re inside the theme parks, the My Disney Experience app becomes essential. Here’s what you’ll use it for:
- Wait times. Check real-time wait times for every ride at all four theme parks. That includes Magic Kingdom Park, EPCOT, Disney’s Hollywood Studios, and Disney’s Animal Kingdom Theme Park. Sort by shortest wait to find walk-on rides.
- Interactive map. Find rides, restaurants, restrooms, and character meet-and-greets on a GPS-powered map. The map updates as you move.
- Mobile food ordering. Order and pay for meals at quick-service restaurants from your phone. Choose a pickup time, and your food is ready when you arrive. No standing in a second line, which helps you save time on busy days.
- Dining check-in and waitlists. Check in to your table-service restaurant from the app when you arrive. If a restaurant accepts walk-ups, you can join the waitlist and get a notification when your table is ready.
- Virtual queues. Join the virtual queue for select attractions. You’ll get a return window and can enjoy other rides while you wait.
- Lightning Lane. Book more Lightning Lane selections throughout the day as you use them. The app shows what’s available in real time.
- Disney Genie service. This free planning tool builds a personalized itinerary based on your interests. It updates throughout the day as wait times and availability change. This service helps optimize your park day.
- Disney MagicMobile Service. Use your phone as your park ticket to enter at theme park gates, redeem Lightning Lane selections, and link Disney PhotoPass images to your account.
- Mobile checkout. Pay for merchandise at select shops from the app. Scan items and check out without waiting in line.
- Car locator. Save your parking spot when you arrive. At the end of a long day, you’ll appreciate having it saved.
The app also shows showtimes for fireworks, parades, and stage shows. Tap the day’s schedule to plan your evening around events like the fireworks at Magic Kingdom Park. This helps you time your day down to the minute.
The app also has a built-in chat feature. Message a Cast Member with questions about park hours or accessibility; no need to find Guest Relations in person.
Hotel guest features
Families staying at a Walt Disney World Resort hotel get extra features in the app. These perks are available at select Walt Disney World Resort hotels.
- Mobile check-in and check-out. Check in through the app before you arrive. Skip the front desk and head straight to your room. On your last day, check out from the app too, no need to stop at the lobby.
- Digital Room Key. Use your phone to unlock your hotel room door. No plastic key card to lose.
- Bus arrival times. See when the next bus, monorail, boat, or Disney Skyliner leaves your resort for each theme park. You’ll never have to guess at the bus stop.
- Room charges. Charge meals, merchandise, and snacks to your room with your MagicBand+ or Disney MagicMobile Service. Track your spending in the app.
Staying on-site also gives you Early Theme Park Entry: 30 minutes in the parks before they open to everyone else. The app shows your early entry window and which parks are open.
Memory Maker and Disney PhotoPass
Disney PhotoPass® Service photographers are at landmarks and select rides across Walt Disney World Resort. They take your family’s photo, and it shows up in the app. Your MagicBand+ or Disney MagicMobile Service links the photos to your account.
You can view every photo for free in the app. To download them, you need Memory Maker. It covers unlimited downloads of all your Disney PhotoPass photos and select ride videos from your trip. One payment covers your whole travel party.
Photos stay in your account for 45 days after they’re taken, so there’s no rush to download them during your vacation. When you get home, download your photos before the 45-day window closes.